How to Start an Email List: An Easy Primer for Bloggers

This post may contain affiliate links, which means I will make a commission at no extra cost to you should you make a purchase.
Facebook and Instagram were down and holy moly, it was like all hell broke loose!
Every FB group that I was in was panicking about this. It was a good a reminder as ever that if you don’t have one yet, it’s essential to start an email list.
Whether you’re dominating Pinterest or have 100K followers on Instagram, we don’t own these platforms. But the one thing you can control is your website and your email list.
Haven’t started your website yet? Check out my step-by-step tutorial here.
Still, I come across so many bloggers and business owners that procrastinate starting their email list.
It’s not overwhelming. I PROMISE! So let’s make it a priority for the month and start your email list now.
If you’re just getting started blogging, you should absolutely start one from the get-go. And if you already have a blog and haven’t done this yet, consider this your nudge to do it now. It’s easy-peasy, I promise
How to Start an Email List: An Easy Peasy Primer for Bloggers
Why You Need an Email List
You know you need an email list, but do you really know how valuable it can be? Here are three major reasons you should start one right now.
- Email Lists Are a Direct Connection to Your Reader. While you may throw up an Instagram post and “pray” at least 3% of your following sees your post, or you pay a few bucks to reach 3-8% of your Facebook fans, an email list hits your reader’s inbox. And the average open rate hovers around 20%!
- Email Lists Convert. Whether you’re emailing your list about your latest service or product offering or promoting your latest blog post, email lists have the highest conversion rate of any other platform.
- Email Lists Engage. There’s something inherently personal about an email. So while readers may be able to catch up with you on your blog or other social media channels, an email is like a behind-the-scenes peek at the action where you can share extra special info and stories just for your subscribers.
I’m Ready to Start an Email List! But, What Do I Say?
I hear ya. The idea of writing yet another piece of content can seem overwhelming. My suggestion is to create an email template that you follow each time and keep it simple in the beginning.
That may mean that you’re only emailing a link or snippet to your latest blog post + a small personal note.
Just like with your blog, you want to make sure you’re adding value in some way.
Why are people on your mailing list? Because they’re getting something from you they can’t get anywhere else!
Here are some more ideas of what to include in your email list that may help you create an email template:
- Your latest blog posts
- Sale alerts
- A personal story on a lesson learned
- An email-exclusive tutorial
- A freebie, like an e-book or workbook
- A behind-the-scenes story
- A sales pitch on your product/services
- FAQs that readers ask you
Really, the sky is the limit! Just remember, instead of feeling overwhelmed, keep it simple in the beginning.
RELATED: 10 Email Ideas to Send to Your List
For my fashion and lifestyle blog, I send out a personal note, a link to the
I’ll also email sale alerts before sharing on any other social networks. Or if I’m doing something like a try-on haul, I’ll send out the link to my newsletter subscribers so they can have first dibs on the content before products sell out.
Even More Email List Ideas
For this blog, I send out a personal note, the latest post and other goodies like a weekly writing tip, helpful resources from around the web and exclusive news and offerings just for subscribers.
You’re on the list too, right? If not, get on it here!
Where Do I Start an Email List?
So you’re ready to start an email list—yay! But there are a
If You Can Swing the Investment, Start with Kit (Formerly ConvertKit)
ConvertKit was made for bloggers, friends. The features are outstanding and it makes growing and starting an email list so easy!
ConvertKit allowed me to easily quadruple my email list when I took a blogging hiatus. And it lets me grow my list on autopilot.
Most importantly, it’s easy to work with.
I knew I wanted to create content upgrades for my blog posts to incentivize readers to opt-in to my mailing list. But signing up for all of these other services and
Instead of having to learn LeadPages or Mailmunch or how to sync it all together, ConvertKit does it all for a low price.
You can create anything from a Landing Page to simple opt-in forms without any additional fees or third party plugins.
It is a bit of an investment in the beginning, but it was a financial decision I decided was worth it because one of my top goals for this blog was to grow my email list.
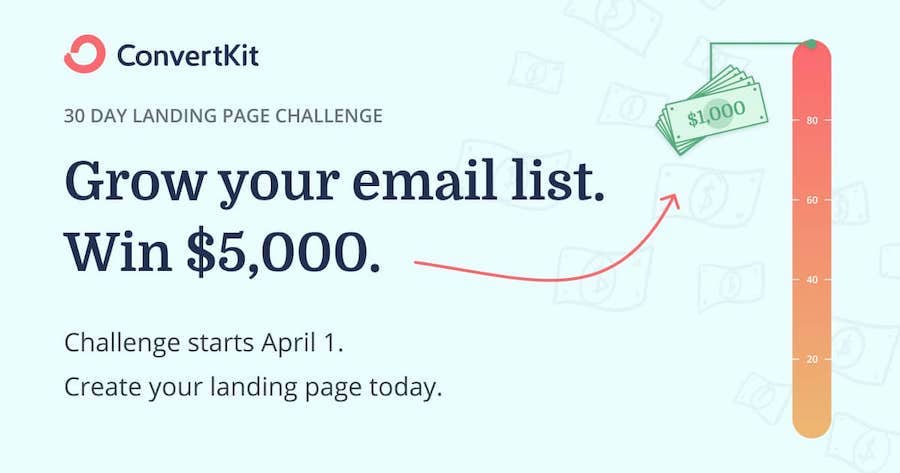
Want to demo ConvertKit? Try it FREE for 30-days with this challenge launching April!
How to Get Started on Kit
To get started on ConvertKit, use this link to create an account and get a free trial. (Email me your receipt and I’ll book you a complimentary 30-minute consult to brainstorm opt-in ideas!)
Here is a short video demo on ConvertKit:
Once you’re logged into ConvertKit, this is the first screen you’ll see. You’ll be prompted to either import your mailing list from another service or create one from scratch.
Once you’ve picked your journey, the first thing you’ll want to do is create a Form.
A “Form” is just what ConvertKit refers to as the form people fill out to join your mailing list.
What I like most about ConvertKit is that you can easily creates tons of custom forms, or opt-ins, for your email subscribers!
This means for each blog post you create, you can create a content upgrade like a worksheet or a printable and have your reader “opt in” to your mailing list in order to receive their free goodie.
Opt-in incentives are one of the most effective ways to grow your email list. Period.
There are many expensive tools out there, like LeadPages, that you have to connect together to get this type of functionality. With ConvertKit, there’s no need for external paid services. You create the form right within your email service provider.
Once you’ve created your first form, you’ll want to get it on your website. You can easily do so by installing the ConvertKit WordPress plugin.
In the backend, enter your API key, API Secret and click on “Refresh Forms” so all of your forms that you’ve created show up. It’s fairly straightforward once you’re in.
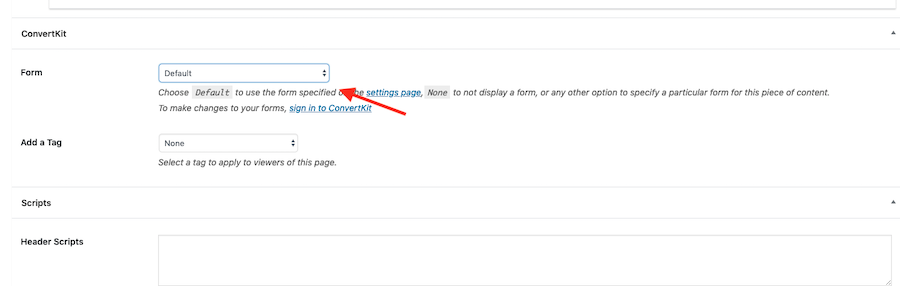
In WordPress, you’ll now easily be able to add a custom form at the end of each blog post. Just scroll down and click on the ConvertKit Form drop-down to select which one you want to appear!
But I Don’t Have the Budget For ConvertKit
If you want to start an email list but don’t have the budget for ConvertKit, I recommend a free plan on Mailerlite.
I recently switched from Mailchimp to Mailerlite for my other blog, and have been so happy that I did so!
Mailerlite has a lot of similar functionalities to ConvertKit, but is totally free up to 1,000 subscribers.
Once you pass 1,000 subscribers, the monthly payment is still lower than ConvertKit, and starts at just $10/month, which is super affordable.

One of my favorite features of Mailerlite is they have beautiful email list templates, and it’s easy to create your own with their “blocks” feature.
You can also create multiple opt-in forms like ConvertKit as well as Automations. (An automation is a sequence of emails that goes out, like a welcome series or a free e-course).
Here is a quick overview of Mailerlite:
Mailerlite vs. Mailchimp Which is Better?
I used Mailchimp for many years and am going to be transparent in that I haven’t been with Mailerlite for very long. But the features available on Mailerlite are leaps and bounds what you have on Mailchimp.
I found it really cumbersome to create pretty newsletters in Mailchimp. And it was difficult to create multiple opt-ins for different blog posts, which is really key in growing your mailing list.
Plus, they are both FREE to start.
Mailchimp is free for up to 2,000 subscribers while Mailerlite is free for up to the first 1,000, but $10/month equates to a Starbucks trip. It’s super affordable for all of the features it comes with.
You can also create landing pages and pop-up forms. Get started with Mailerlite here.
MailerLite vs. ConvertKit, Which is Better?
While MailerLite has very similar features to ConvertKit, I still recommend ConvertKit as the #1 do-it-all email service provider.
It has far more advanced functionality. That’s why I started out with ConvertKit
There are Pros and Cons to both, of course. It is far easier to customize pretty newsletters in MailerLite than ConvertKit. So if that’s important to you, that may be something to consider.
But tagging users and creating
Email List Best Practices
So you started an email list—congrats—and picked your ESP. Here are a few other things to know when you’re just starting your email list!
- Create a template and keep it consistent. This is the easiest way to get started with your mailing list.
- Create a schedule and stick to it. Just like with your blogging schedule, you’ll want to pick the same day/time of week to email subscribers!
RELATED: How to Create an Editorial Calendar
- Promote the shit out of it. I’ll have to dive into the basics of creating a great opt-in at a later date. But be sure that whatever it is you create, you show it off in many places. That includes within your content, at the end of your content, your sidebar, pop-up…many places! You never know where a user will see and engage with your opt-in
Cliff Notes: It takes less than 10 minutes to start an email list and start getting subscribers! Just pick your email list provider and then decide on what kind of content you want to send out. Create a regular schedule and start promoting that list!
Like this post? Pin me, please!
Great advice! Will check out Mailerlite until I can afford ConvertKit.
Hi Marlene,
Thanks for sharing this post. It’s been very helpful.
It’s not easy to start an email list because it requires a strategy, a lot of work and a lot of time.
But I believe, if you are doing it consistently, you can get results.
Aaron